


CURLING IRON SPRING REPLACEMENT INSTRUCTIONS
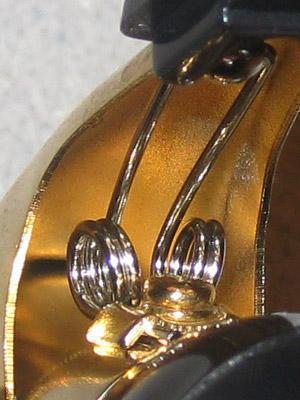
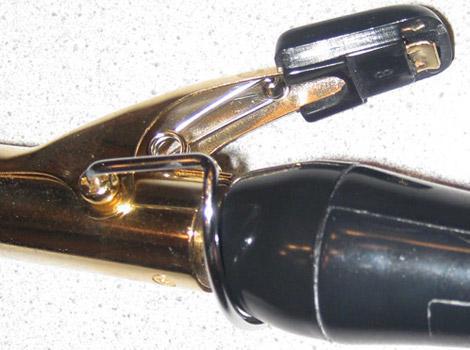
 Measure your broken spring like the picture on the right to get the correct size.
PLEASE MEASURE YOUR OLD SPRING BEFORE ORDERING!

QUICK USA SHIPPING

QUICK USA SHIPPING
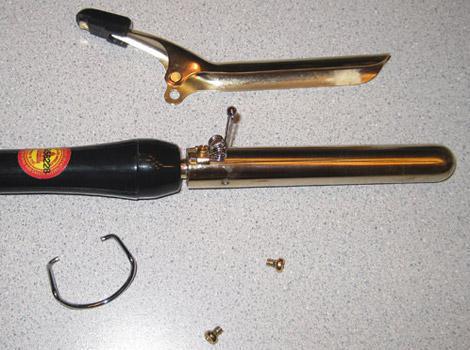
MOST CURLING IRONS - STEP BY STEP SPRING INSTALLATION INSTRUCTIONS
1. Unplug the curling iron.
2. Remove the curling iron stand by grasping one side of the stand and pulling outward and down under the iron; causing the stand to release. Careful not to bend the stand any further than necessary.
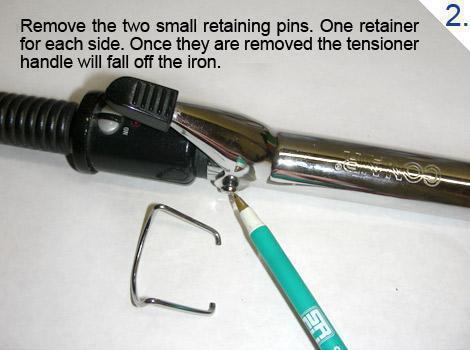
3. Remove the two small side screws from the curling iron handle with a philips #1 screwdriver. One screw for each side. Some curling irons have retaining pins that pop out as shown in the video above. Once they are removed the tensioner handle will fall off the iron.
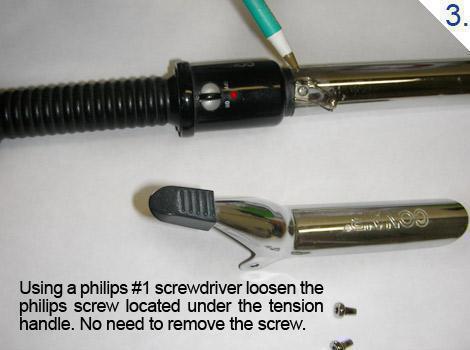
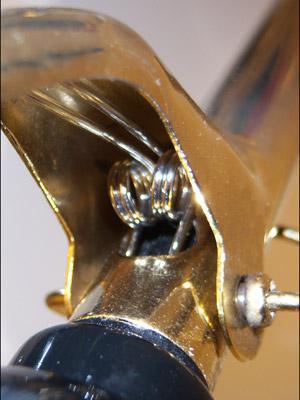
4. Remove the broken spring by loosening the screw holding the clip under the tension handle. No need to remove the screw.
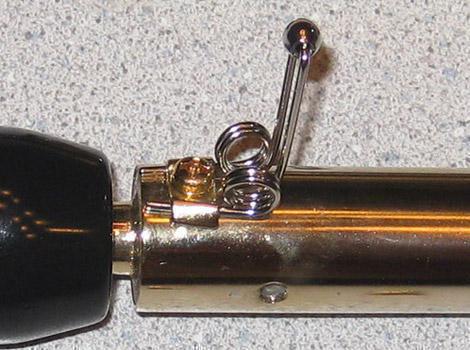
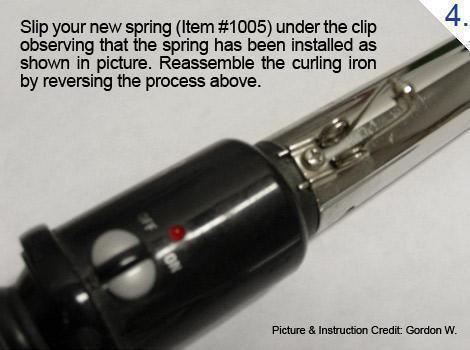
5. Install the new replacement spring by slipping the spring under the clip. You may have to squeeze the spring's two wires together to fit into the clip. Tighten the screw down on the clip.
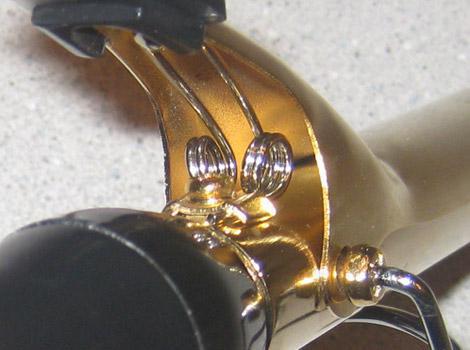
6. Re-attach the handle to the barrel and install the side screws or retaining pins. The handle will feel stiff when attaching; this is normal.
7. Re-attach the curling iron stand.
2. Remove the curling iron stand by grasping one side of the stand and pulling outward and down under the iron; causing the stand to release. Careful not to bend the stand any further than necessary.
3. Remove the two small side screws from the curling iron handle with a philips #1 screwdriver. One screw for each side. Some curling irons have retaining pins that pop out as shown in the video above. Once they are removed the tensioner handle will fall off the iron.
4. Remove the broken spring by loosening the screw holding the clip under the tension handle. No need to remove the screw.
5. Install the new replacement spring by slipping the spring under the clip. You may have to squeeze the spring's two wires together to fit into the clip. Tighten the screw down on the clip.
6. Re-attach the handle to the barrel and install the side screws or retaining pins. The handle will feel stiff when attaching; this is normal.
7. Re-attach the curling iron stand.
We are not responsible for damage to your curling iron or injury to yourself by purchasing our springs or following our spring replacement instructions.
Please Look Below For Visual Instructions:
CONAIR CURLING IRON - SPRING INSTALLATION VIDEO
PROVIDED BY ONE OF OUR CUSTOMERS - GILES R 8-31-2012
PROVIDED BY ONE OF OUR CUSTOMERS - GILES R 8-31-2012
Conair Model CD82J
Video Credit: YouTube User @BigG1794
Video Credit: YouTube User @BigG1794
REVLON CURLING IRON - SPRING INSTALLATION VIDEO
FROM ONE OF OUR CUSTOMERS - Dr Shock 3-23-2019
FROM ONE OF OUR CUSTOMERS - Dr Shock 3-23-2019
Revlon RVIR1103
Video Credit: YouTube User @DrShock
Video Credit: YouTube User @DrShock
CONAIR CURLING IRON - STEP BY STEP
SPRING INSTALLATION INSTRUCTIONS
PROVIDED BY ONE OF OUR CUSTOMERS - GORDON W 8/31/2012
SPRING INSTALLATION INSTRUCTIONS
PROVIDED BY ONE OF OUR CUSTOMERS - GORDON W 8/31/2012

HELEN OF TROY "OLD STYLE" CURLING IRON
STEP BY STEP SPRING INSTALLATION INSTRUCTIONS
STEP BY STEP SPRING INSTALLATION INSTRUCTIONS
Some Helen of Troy "OLD STYLE" curling irons have a large whole in the barrel and the spring prong installs inside the hole.
1. Unplug the curling iron.
2. Remove the curling iron stand by grasping one side of the stand and pulling outward and down under the iron; causing the stand to release. Careful not to bend the stand any further than necessary.
3. Remove the two small side screws from the curling iron handle with a philips #1 screwdriver. One screw for each side. Some curling irons have retaining pins that pop out as shown in the video above. Once they are removed the tensioner handle will fall off the iron.
4. Remove the broken spring by sliding it out of the hole.
5. Install the new replacement spring. You will have to squeeze the spring's two wires together to slide into the hole.
6. Re-attach the handle to the barrel and install the side screws or retaining pins. The handle will feel stiff when attaching; this is normal.
7. Re-attach the curling iron stand.
We are not responsible for damage to your curling iron or injury to yourself by purchasing our springs or following our spring replacement instructions.